
As shown in a previous blog post, KP development suite has a great automation tool – Runner / Stadium which can crunch simulations of hundreds of games with AI players in a matter of hours. Such automation is good not only for AI tweaks, but also for tracking down bugs and improving overall game performance and balance. These things go hand in hand – better AI can use more of game mechanics and features, which lead to more bugs being discovered and more sub-systems being used that affect the game’s performance, making it more representative of what actual players will experience. Larger target being – let the machine do the dirty work of discovering bugs instead of players.
My current PC is an i7 870 Lynnfield, with 4 cores dating back to 2010 or so. It is old, but still quite capable of running the game in Stadium in 8 threads and producing meaningful results in a sane amount of time (see previous blog post). To make a reference point, let’s take a 4p Crossing map – a 2 hour game takes 175 seconds to complete in one thread. Given that KP is a single-threaded application, it multithreads very well and it also takes full advantage of Hyper-Threading – we can have a total of 8 threads, it gives us 16 hours simulated in 175 seconds. In other words, my current PC working at full load is capable of simulating ~5.5 minutes per second.
Being able to simulate whole minutes in a mere second is an amazing result, but it means that I can barely use the PC during that as CPU load is 100% and there’s little to no processing power left for other things. For practical purposes, no more than 7 threads could be used, which is still some impressive 4.8 game minutes per 1 real second.
I need more though. Tweaking AI parameters means that I need to make informed decisions about preferring one setup over the other, where due to the random nature of the game, results are very “noisy” and meaningful statistical difference starts to show up only after hundreds of games results are averaged out. So I started to look into servers in April 2020 (right when the prices went up). Since KP can be simulated in headless mode, it needs just a lot of threads and a handful of RAM and no GPU. Perfect job for a server-like PC.
Since I needed a lot of cores and pretty much nothing else, the choice initially was between AMD Threadrippers and 5900X. Both were very pricey though (especially with reliable motherboards factored in) and they would have only 2 RAM channels. Having dozens of games being simulated at once surely means a lot of memory access. New 4-channel motherboards are very expensive. Another option was to go for refurbished Intels and 2-CPU motherboards. Among these choices there was another option – new Chinese motherboards. AliExpress offers both second-hand CPUs and new motherboards. For a fraction of the price, one can get an older server CPU and a new 2-CPU motherboard (based on the older X99 chipset though). 2 CPUs have another advantage that each one can access its own RAM via 2 channels.
Target configuration (met 100%) – Huananzhi X99 F8D motherboard ver 2.2, two Intel E5 2680V4, 4x4gb Samsung PC2400 DDR4, two Snowman 6-heatpipe 2 fans coolers, Chieftec 850W PSU, my old Nvidia N250GTS, Netac SSD.
While the order was en route, I started searching for a case and minor supplies. The case needed to be a big one, to accommodate the EATX motherboard and allow for good air circulation. New ones were quite pricey and I didn’t fancy the fact that they all look ugly with those perforated black fronts and tops. On the other hand, I could buy a second-hand case for 1/10th of the price and custom mod it to my needs.
The case I found was Thermaltake Armor VA8000 – tall and wide ATX tower with vertically placed PSU mount, lots of fans, whole front full of 5″ slots, thick metal, broken covers and full of dust and gibberish from previous owners.
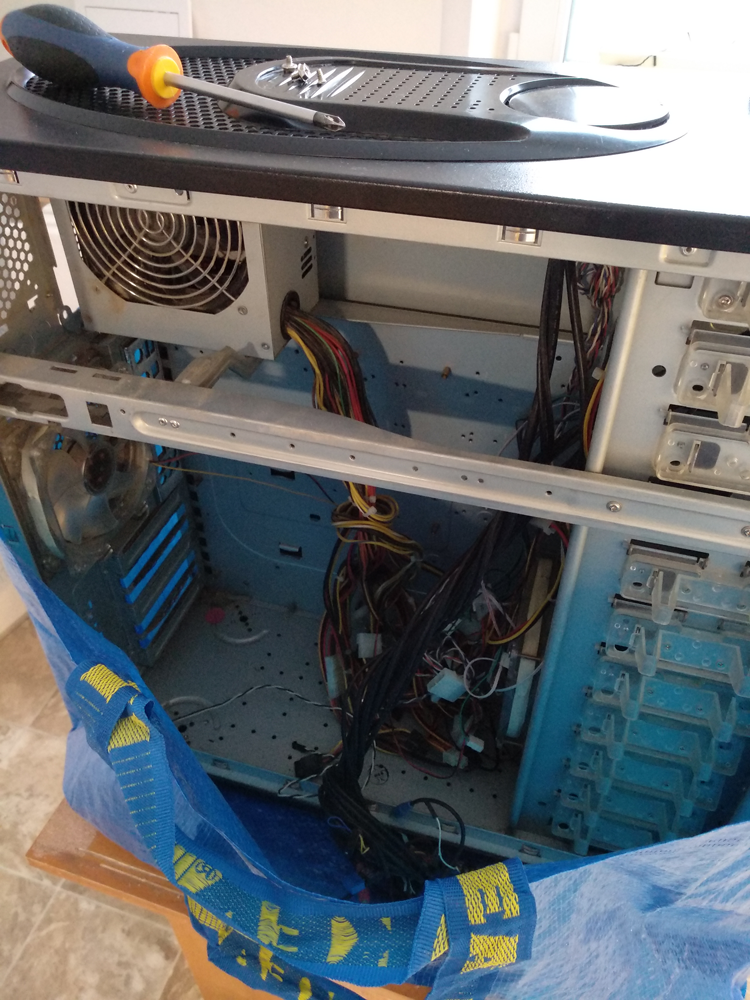
Cleaning up and throwing junk out took some time. In the process I threw out the whole front panel, because it was so clunky and cumbersome – servers don’t need fancy fronts! The PSU that went with the case had capacitors blown, so I decided to throw it away too, salvaging just a couple of parts, including the fan (you will see it later). All case’s fan cages and HDD rack also went into the dump – unnecessary dust-accumulators.
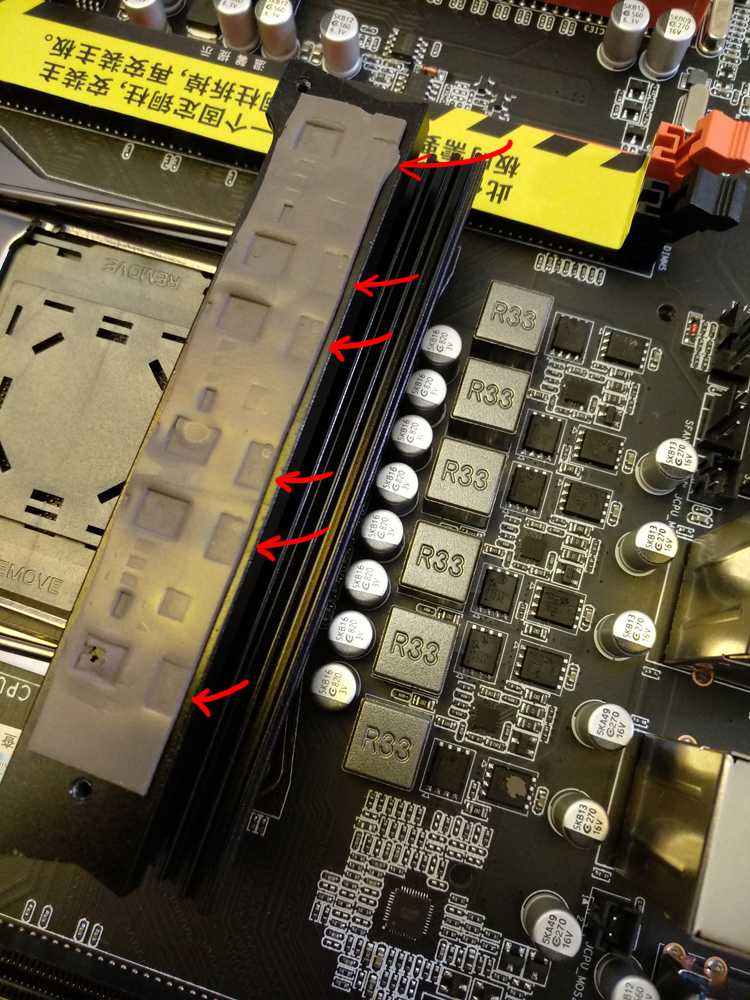
Motherboard arrived first in late December. Since it was from quite a new and untested brand, a thorough inspection was required. To my relief, everything looked fine except a stray uncut pin on the back and some minor corrosion on some of the copper pads all around (I hope it won’t compromise the soldering..). Following fellow reports I also have checked VRM radiators and discovered that one’s thermal pad was offset by as much as 1/4 leaving half of the VRMs uncovered. This was an easy fix to carefully re-align and re-adhere the pad. A couple of days later these pads were replaced altogether (more on that later).
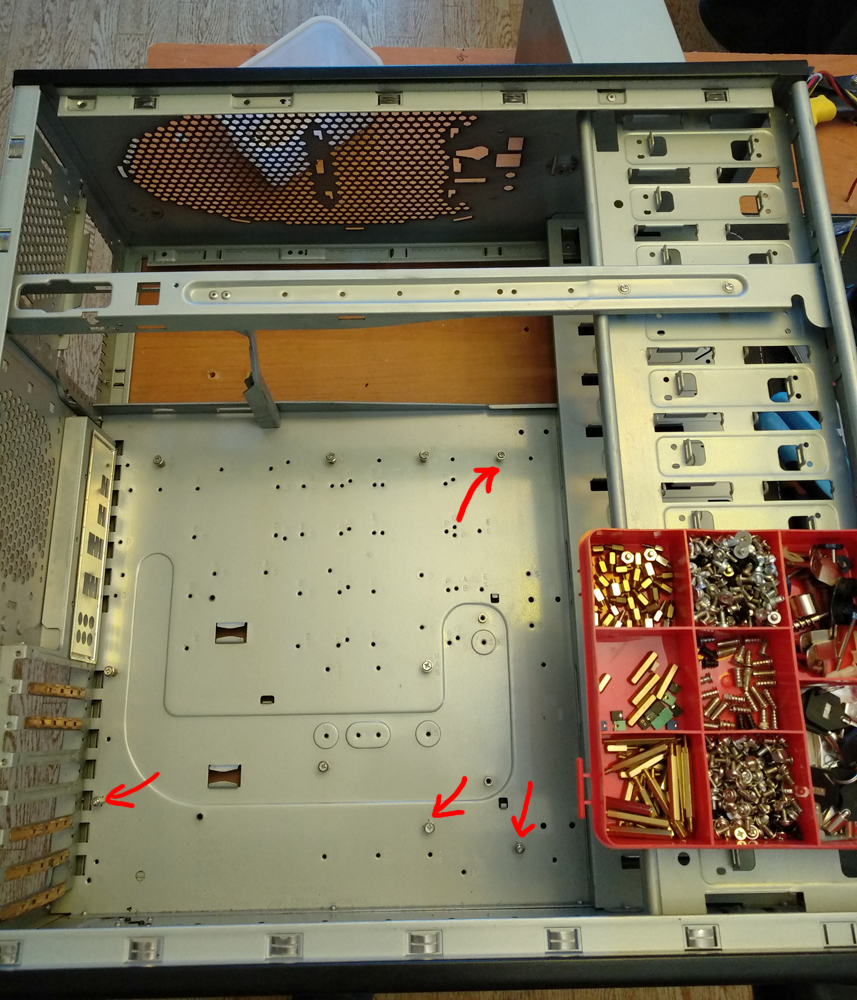
Despite the computer case having a whole assortment of motherboard mount locations from various standards, I still had to map and add 4 missing ones for the motherboard I have.
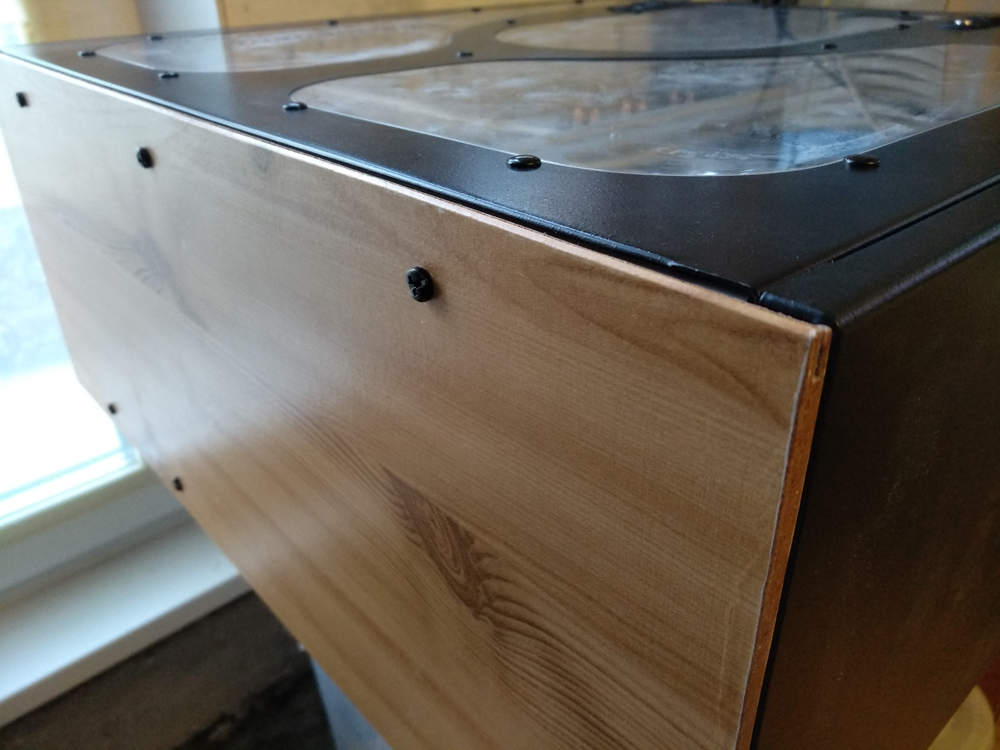
Case front was covered with a plain piece of thin MDF – nothing to see there (will add power buttons and LEDs later on, and an intake fan if needed).
RAM and coolers came in early January – no surprises here. Had to swap one cooler’s fans around, so that they could all fit and form a straight air flow when placed on the motherboard. Unfortunately, due to large holding brackets and nearby RAM slots, they could not be set in parallel (facing up). 2 RAM slots were also blocked by the bracket levers. This is fixable (levers would need to be trimmed by just a few mm), but since I had only 4 RAM planks – that was okay. CPUs came a week later and finally I was able to begin the full assembly.
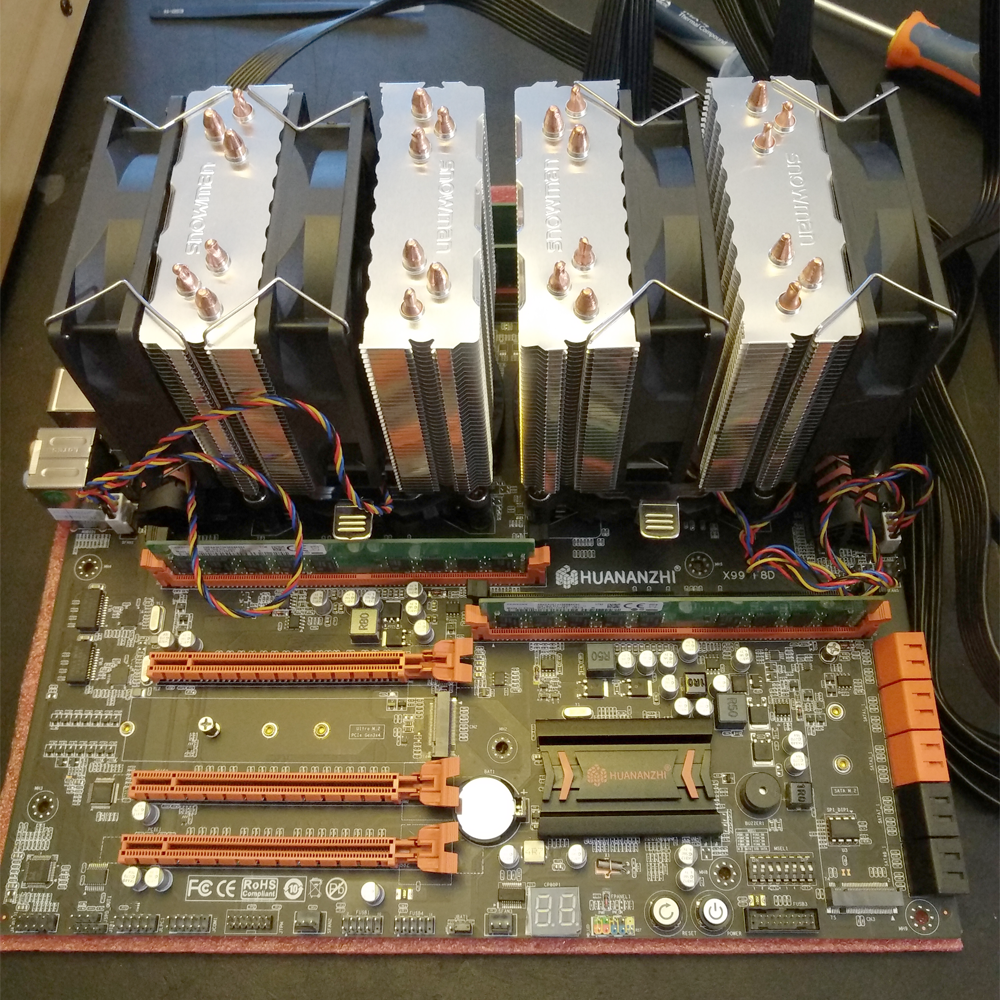
Hardware assembly went fine. According to the instructions, a couple more steps were required – putting in a CR2032 battery, resetting CMOS and toggling 8 dip switches to configure SATA usage (from what I read, motherboard revisions of 2.3 and up don’t need this last step – it is done programmatically there). Figuring out SATA setup was not easy though, I spent a good portion of the day on that due to faulty SATA cable (had to test it on my main PC to verify that). After replacing the cable everything went well.
OS installation went straightforward, Win7 is enough for such a server. Huananzhi LAN drivers refused to install with “FindFile failed” error, finding and manually choosing replacement Realtek drivers (from Lenovo?) worked well. Boot time, albeit said to be long, was not a big issue – I can wait 30 sec. Other than that, everything else went surprisingly well – all the cores were present, CPU frequency was good, RAM recognized, SSD working fast.
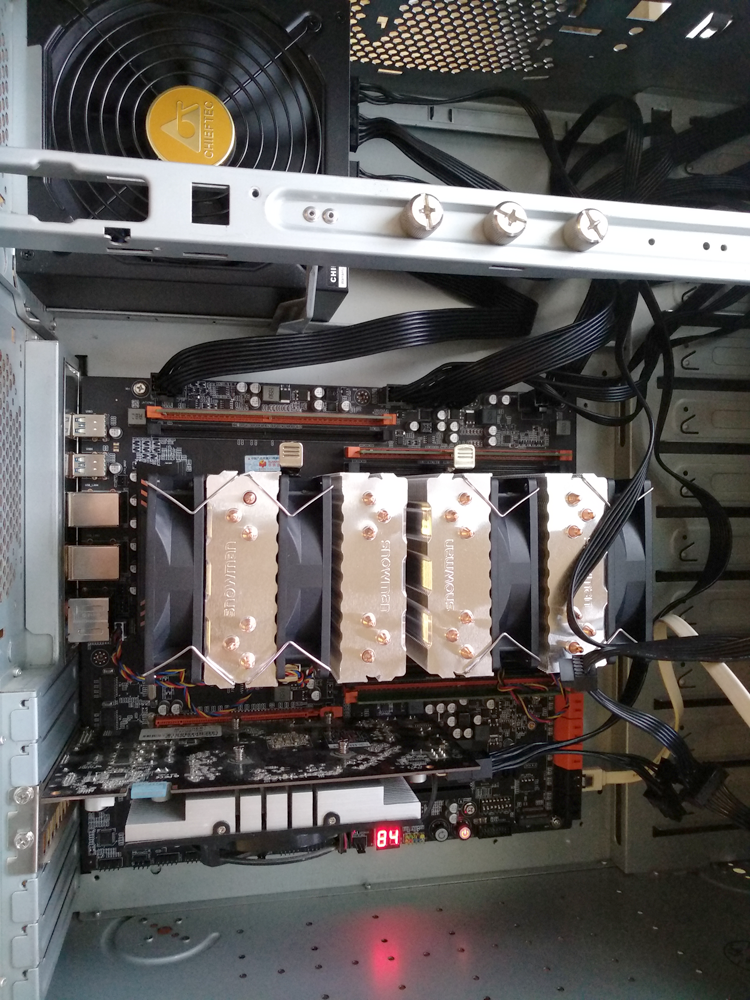
Seeing 56 threads fully loaded with crunching the game simulations is a satisfying sight:

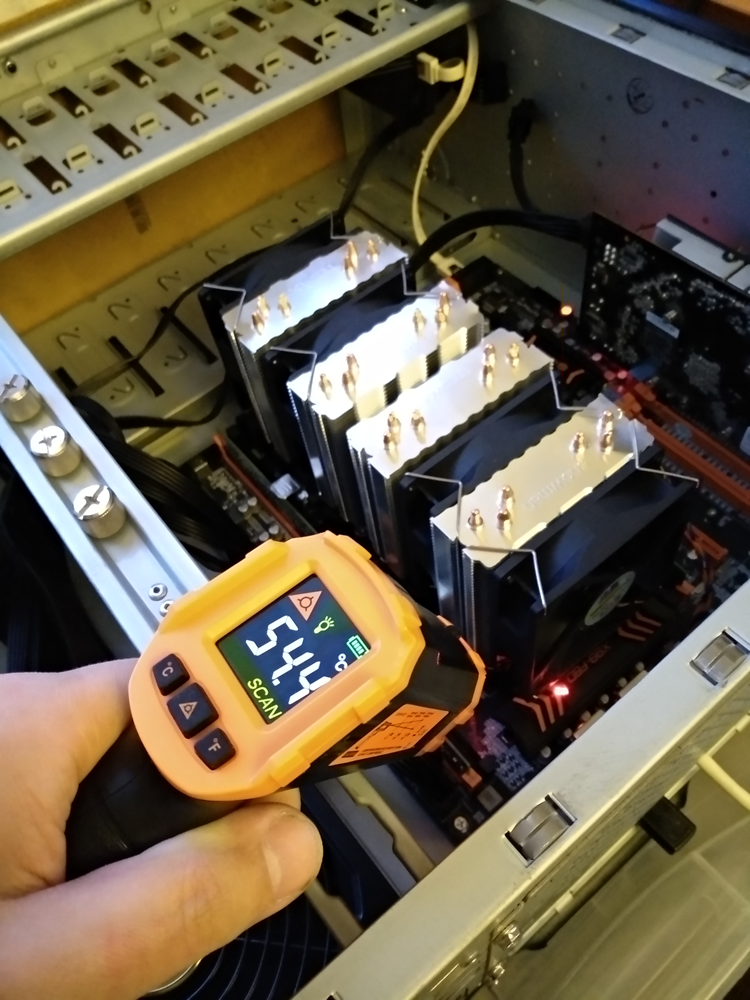
Next immediate concern was temperatures. After all, these are two very hot square tiles under those heatsinks, each converting up to 120 watts of electrical energy into heat continuously under load. Providing those CPUs with the right voltage at such loads, VRMs are also big heat generators. Measuring CPU temperatures under load in the open case showed up to +55C and +61C respectively (the second CPU in the cooling line is a bit hotter). Closing the case caused the temperatures to quickly rise by ~7C before I decided not to continue the test and started to look into airflow optimizations. First and most obvious flaw was at the back – CPU air flow hit the backplate.
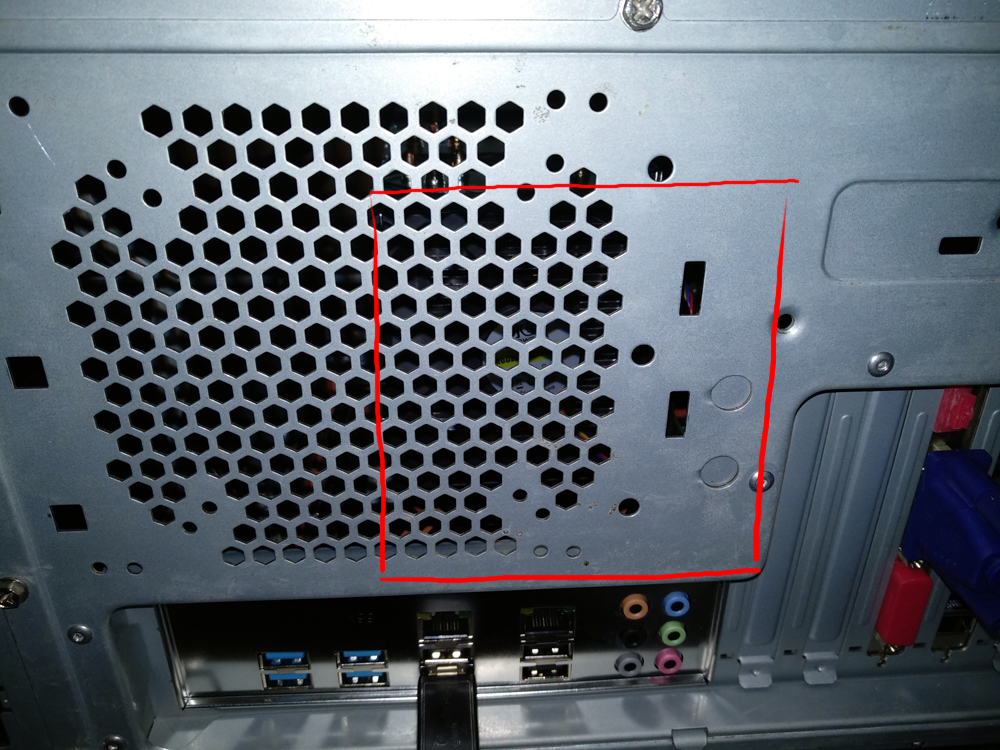
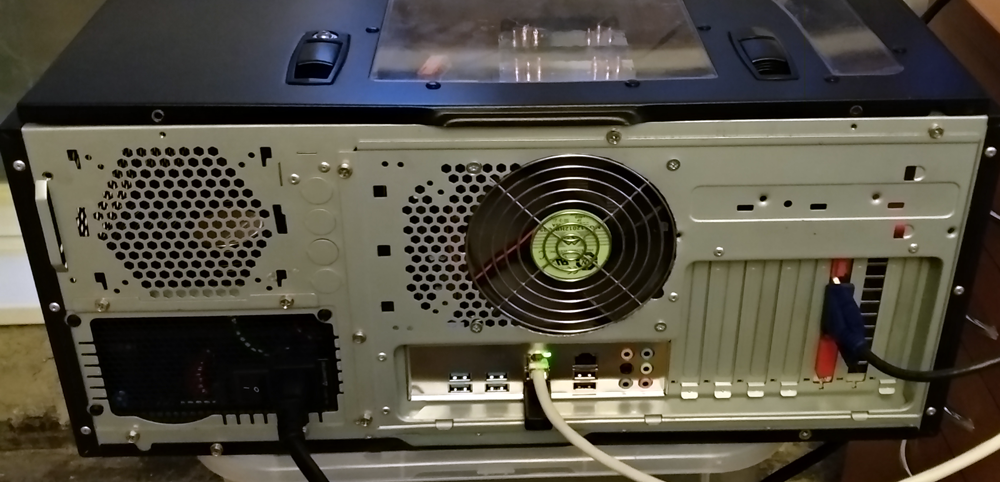
Straight air exit was needed. Since the case was a wide one, it easily accommodated a 12cm fan (taken from the old PSU mentioned above), I only had to cut out the metal and fasten the fan with the wire grill. Powering the fan directly from the PSU at 7 volts was a good compromise between airflow and noise. This had a great effect – CPUs temperatures went down -10C. Even in the closed case they don’t go higher than +55C and +60C now.
Second worrying issue was VRM radiator temperature, which climbed up to +63C on the radiator top in an open case. VRM chips’ temperature must have been at least 15C higher. Temperature reading in an idle state was not very much lower – +54C.
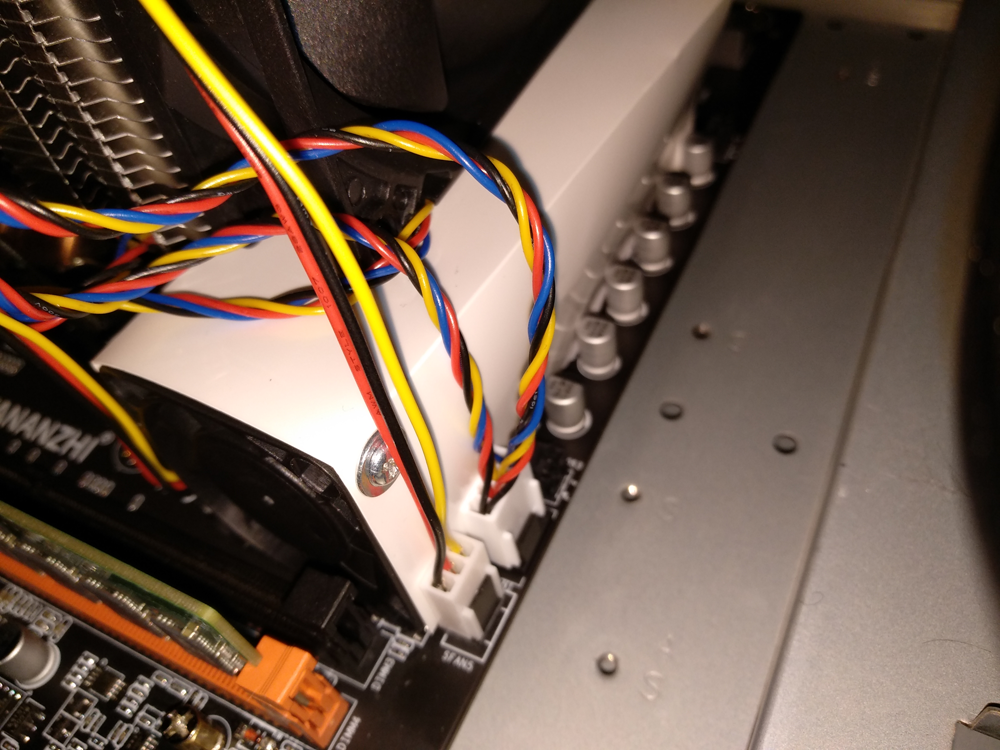
Looking for a replacement for the existing not-so-good aluminum radiators was not easy. I could not find a copper radiator with specified size (100 x 20 x 35 mm). Best I found was 100 x 75 x 24 mm. That radiator needed to be cut to size and mounting holes were to be added. Even with a good hacksaw and drills, this is a chore. Hence I decided to give it a go with the stock radiators, better and thinner thermal pads and add cooling tunnels around them (huge thanks to Dah for helping me with this idea and overall troubleshooting and good advice on other hardware issues). Thin plastic sheets were bent into U like shapes with 38mm sides and 110mm length. One small 4cm fan was securely attached on the intake end with small screws of each tunnel. Tunnels are firmly held in place with springback from CPU fans pushing on them from top. Fans are powered from the motherboard. Unfortunately, they don’t seem to be regulated in any way, but since they are so small and relatively slow-paced, they don’t add much to the noise.
This drastically improved the VRMs temperature under load. It went down from +63C to +42C.This is largely attributed to the poor radiators shape choice, which coped badly with convection cooling and worked well with throughout air flow.
With all this work – what’s the final result? As noted above, my old PC was capable of ~5min of game simulation per second. New server is capable of running 56 threads, each crunching a 2 hour game in ~100sec. That is 112 hours every 100sec ~67min of game simulation per second. Solid x13 improvement! Now that I write it, I’m shocked and amazed myself – how much more processing power I have at my command xD
Good read!
Gratz on new machine. Good work.
i wonder if in the discord can show more screenshots of the development of Alpha 13.