Making a new game from scratch is a huge deal, but what about redoing an existing 2D into 3D? Game logic remains 2D, most of the internals don’t change that much either. Still it is a huge deal when it comes to graphics – there everything needs to be made anew. One of the biggest tasks is to animate the units. Skeletal animation is a known standard here, so that will be my topic today.

Here is a short comparison of rendering workflow between sprites (2D) and 3D:
![]() (for our case we assume sprites are not hand-painted by an artist)
(for our case we assume sprites are not hand-painted by an artist)
Essential steps are all the same, but 3D approach does more work in the game on-the-fly, where’s Sprites are rendered “offline”. Each has it pros and cons really, but generally speaking, once we have pipeline ready – 3D is more handy. Models can be updated in game with a few mouse-clicks.
Said that – what about the rendering pipeline? For that we had to solve several tasks:
- Create 3D model – that was done in Lightwave 3D, a tool I have used since late 90’s. It is quite straightforward in use and that is where its power lays.
- Animate 3D model – Lightwave 3D as well. The process of animating is a lot more complicated, but eventually – doable. I shiver at thought of amount of work that needs to be done here though.
- Import 3D model into the game in a format that is easy to handle. Here I have used many of routines from my older World Racing modding tools.
- Export animation info. Since native animation format is very complicated, I had to pick a simpler format that does not have all the auxiliary settings in it. After some Googling the short list was made – of export plugins available for Lightwave.
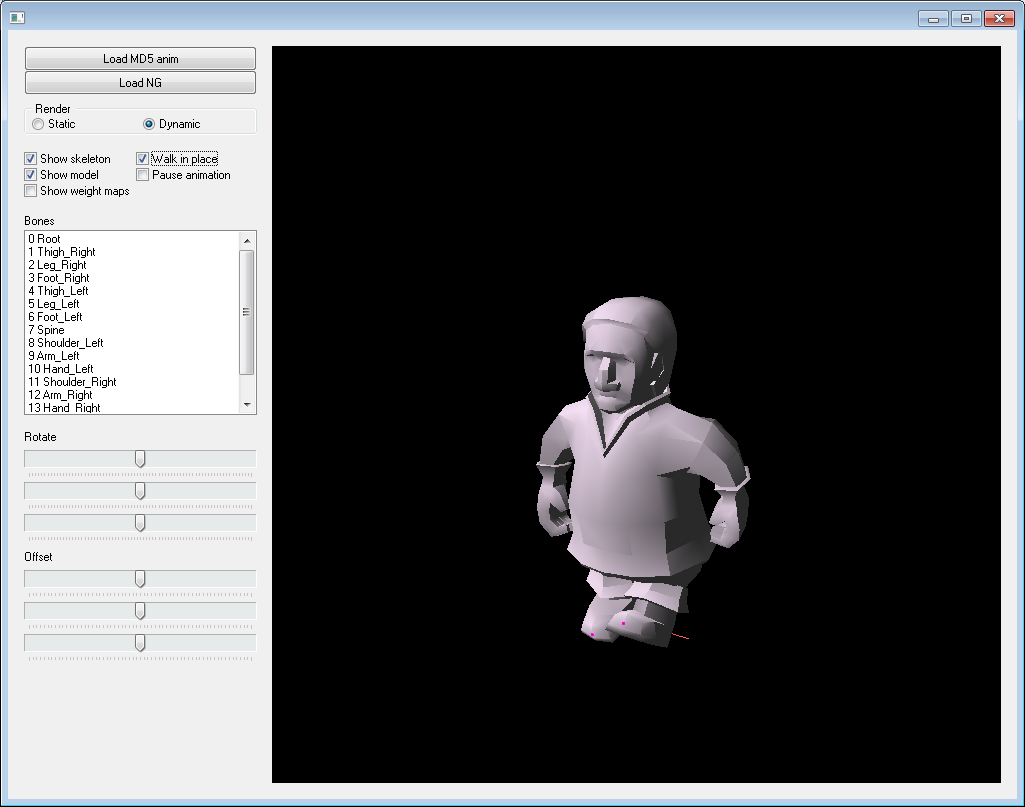
- The hard part – do the skeletal animation in game. For that a separate tool was written, that would load the parts and render them, while allowing to debug most of the steps “live”, including individual bones. Once everything is polished we can plug it into the game.
- And of course rendering it all using OpenGL – trivial.
First stop – a model
First things first – we need to make a 3D model of a unit. Something that can be our crash-test dummy, with arms and legs. Time to remember how 3D modelling works:
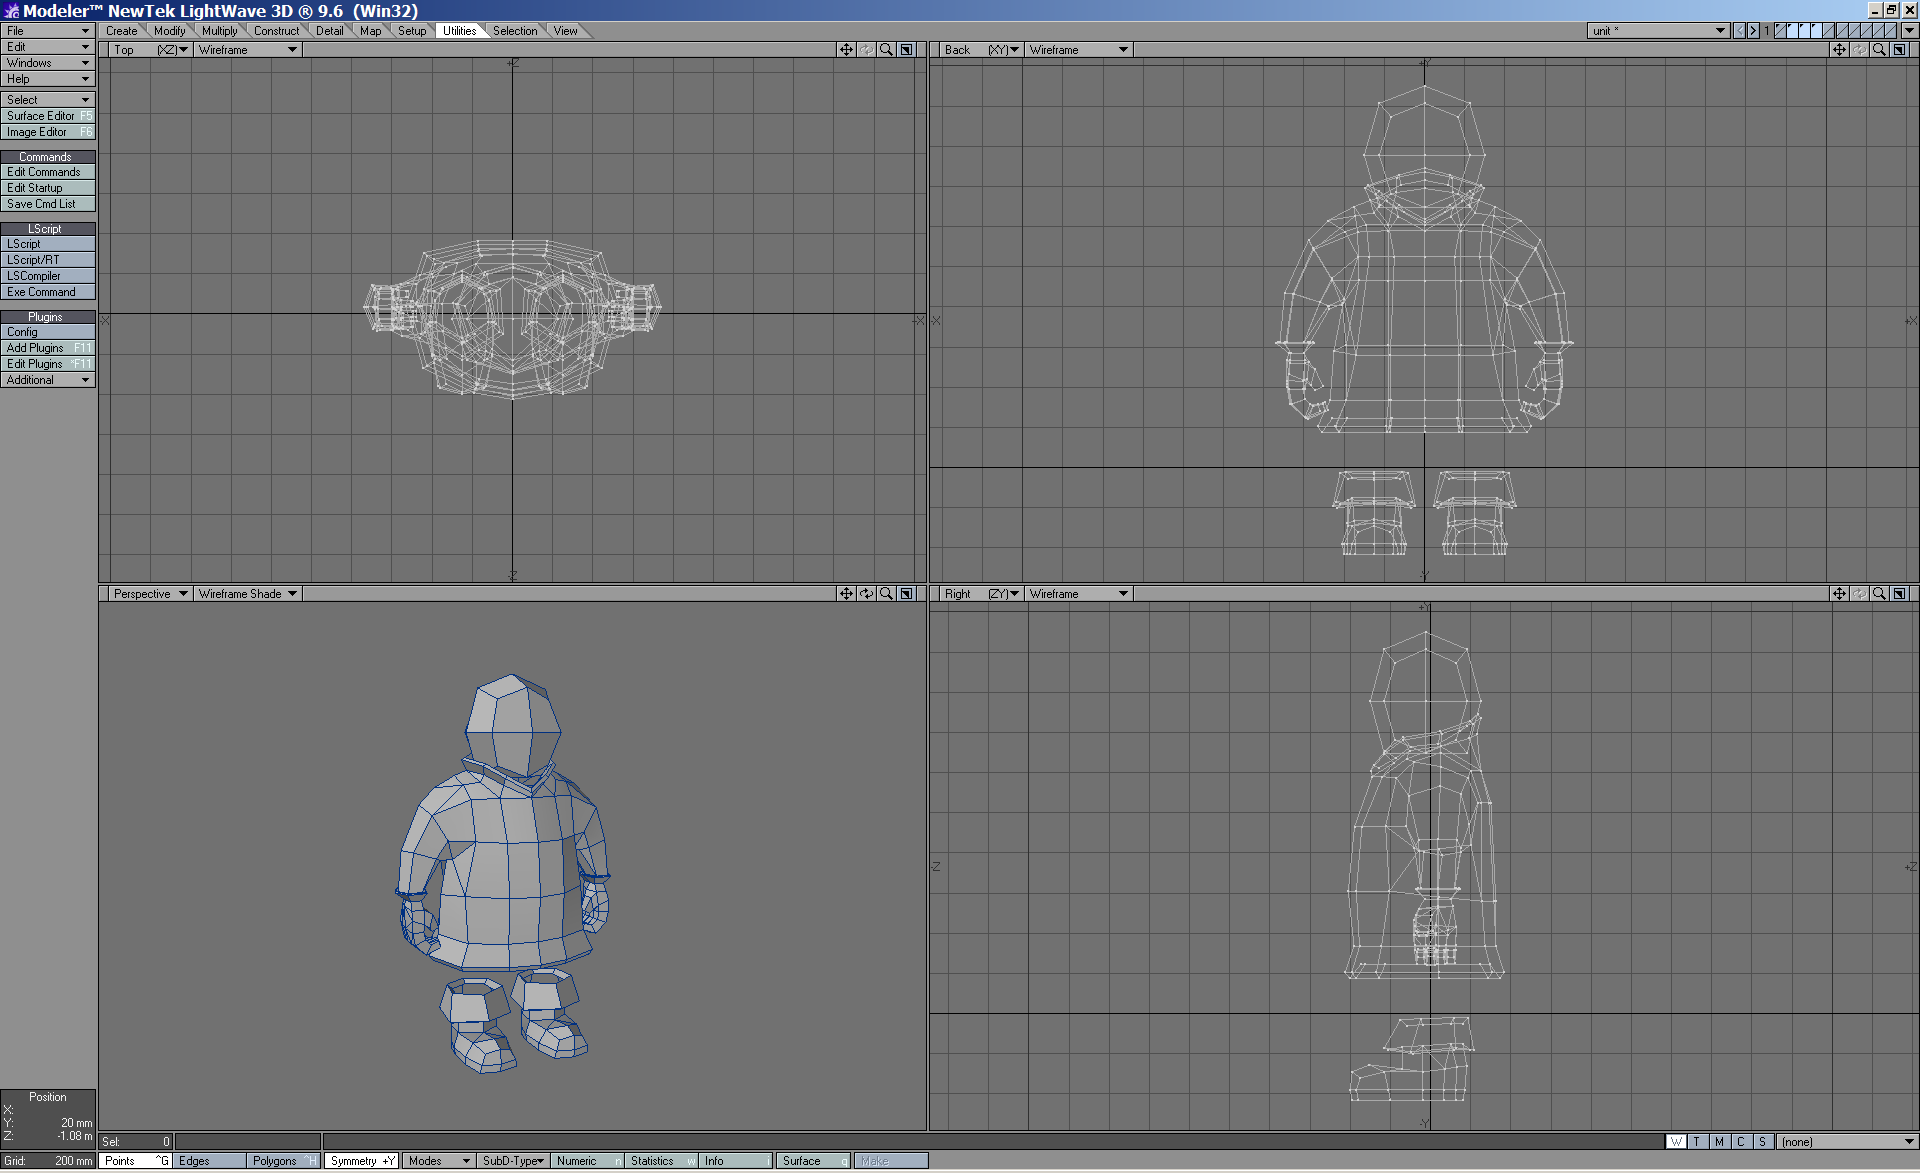
This is a typical layout of 3D modelling process – 3 views from top/front/side and a 3D preview where model can be rotated and viewed from any angle. After a couple more iterations the dummy starts looking like a fisherman – real progress:
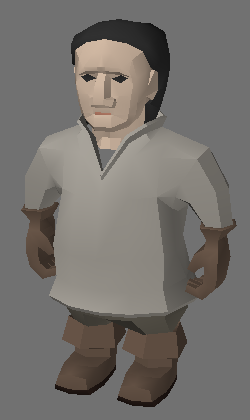
It fun trying to balance between unnecessary details and avoiding too blocky looks. I think this one came out pretty decent. So now we have our test subject, ready to be animated and pasted into the game.
Going further – so what is the skeletal animation?
Base setup consists of 3 main parts: 3D model where each vertex knows a bone (or a few) it needs to follow; Skeleton made from hierarchy of bones – just like we humans have; Animation info recorded as positions and rotations of bones along time. Having that, it’s a matter of vector math to take the base model and transform/rotate all its vertices following their target bones transforms/rotations. Tricky part is to make everything work right, because of hierarchical nature of skeleton and animation – even slightest mistake near the root makes the end result wildly wrong.
One of such examples is system of coordinates, which is different between Lightwave and our game. Lightwave ground plane is set along XZ axis and axis Y is directed top. In NextGame we have XY as ground plane and Z is directed top. So far it sounds simple, just swap the Y/Z coordinates. Things get trickier when we discover that along with the swap one axis should be also inverted, no big deal, but a lot of confusion – should we invert one, or the other two. Then there are normals, which are computed in model-space at first, they need to be swapped as well. And the complicated part – rotations. Bones animations are exported in a set of moves and rotations. Order of operations is important, misplace two and the end result looks like a cripple. Lightwave rotations are applied in certain order and that order has to be maintained in the game, with regard to coordinate axis we have swapped earlier. Now one more complication – ice that with a system of pivots – these are “offsets” applied before the actual rotations take place. All of that is hierarchical, being applied on top of each other for each bone that affects the bones after is. Make a tiny mistake in this chain and the result looks like this:

Having that sorted out, let’s head into rigging part – process of joining parts together!
One of the handy things about animation is how easy it is to rig … joking:
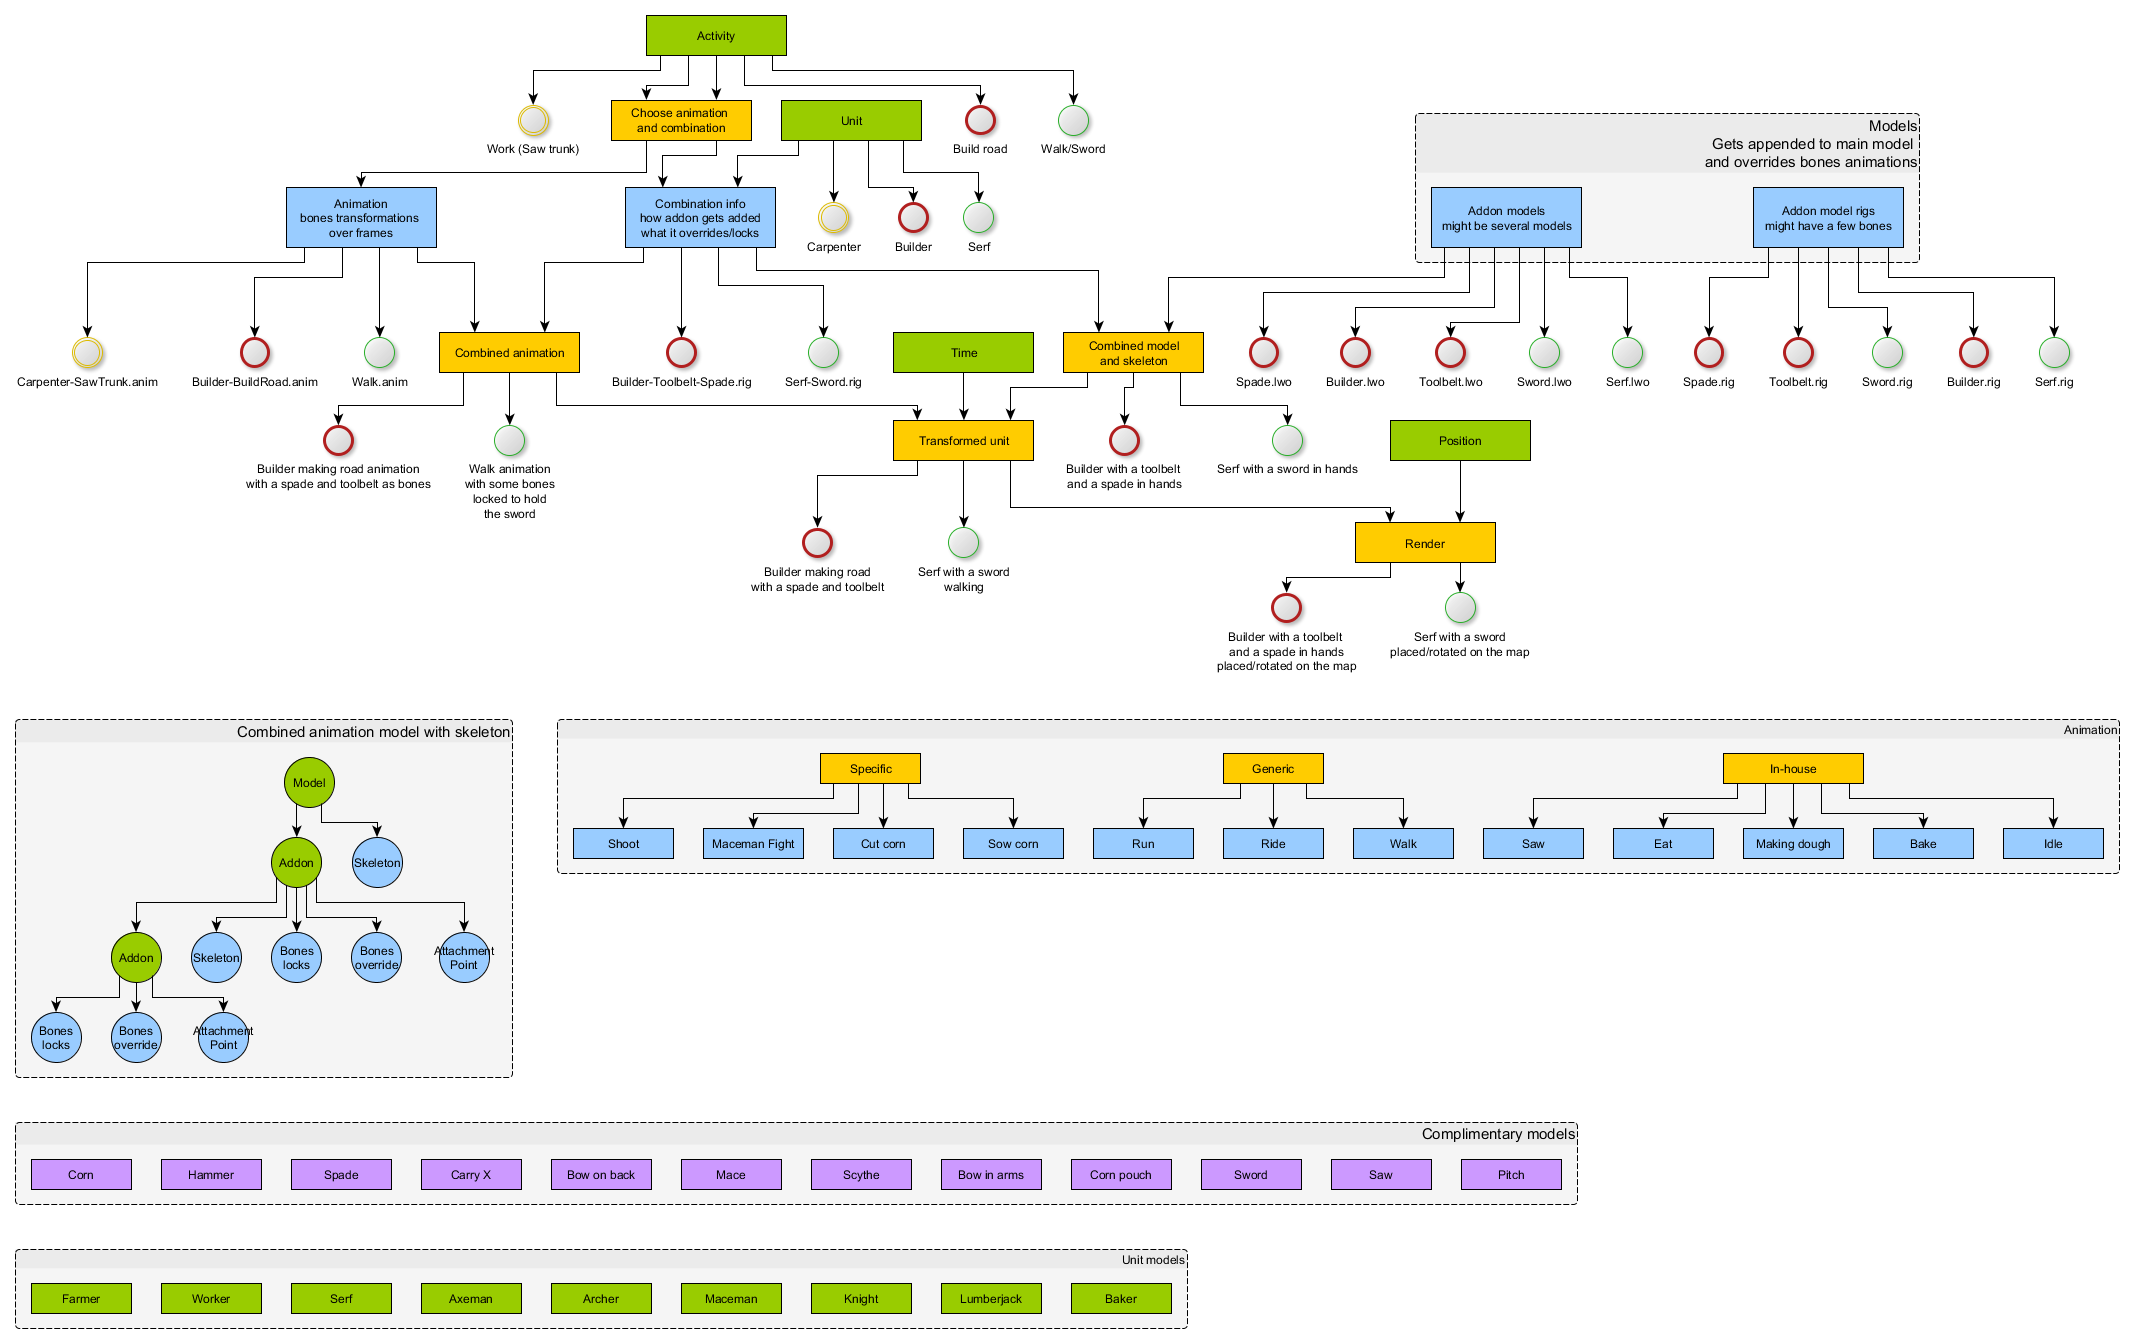
On the upper part you can see structure of rigging and animation, where red/yellow circles are examples – showing two test-cases: a worker and a servant. Parts below are collections of models and animations that are planned to be used.
Let’s focus on the upper part of the diagram – that is where all the interesting things are happening. The idea behind the rigging is to be able to minimize duplication of resources. That means that when we need a servant with stone in hands and a servant with log in hands – we don’t do two separate servants models, with separate walk animations. We want to have a single servant model (to carry anything and do other activities), single walk animation (shared for all walking units) and single models for stones and logs. That is possible if we can combine models and animations. So for example a servant carrying a log is combined from 2 models (a servant and a log), log being positioned next to an arm, then we apply walk animation, but specifically override one of the servants hands bones to hold tight the log instead of swinging free (see top illustration).
Having all that in place.
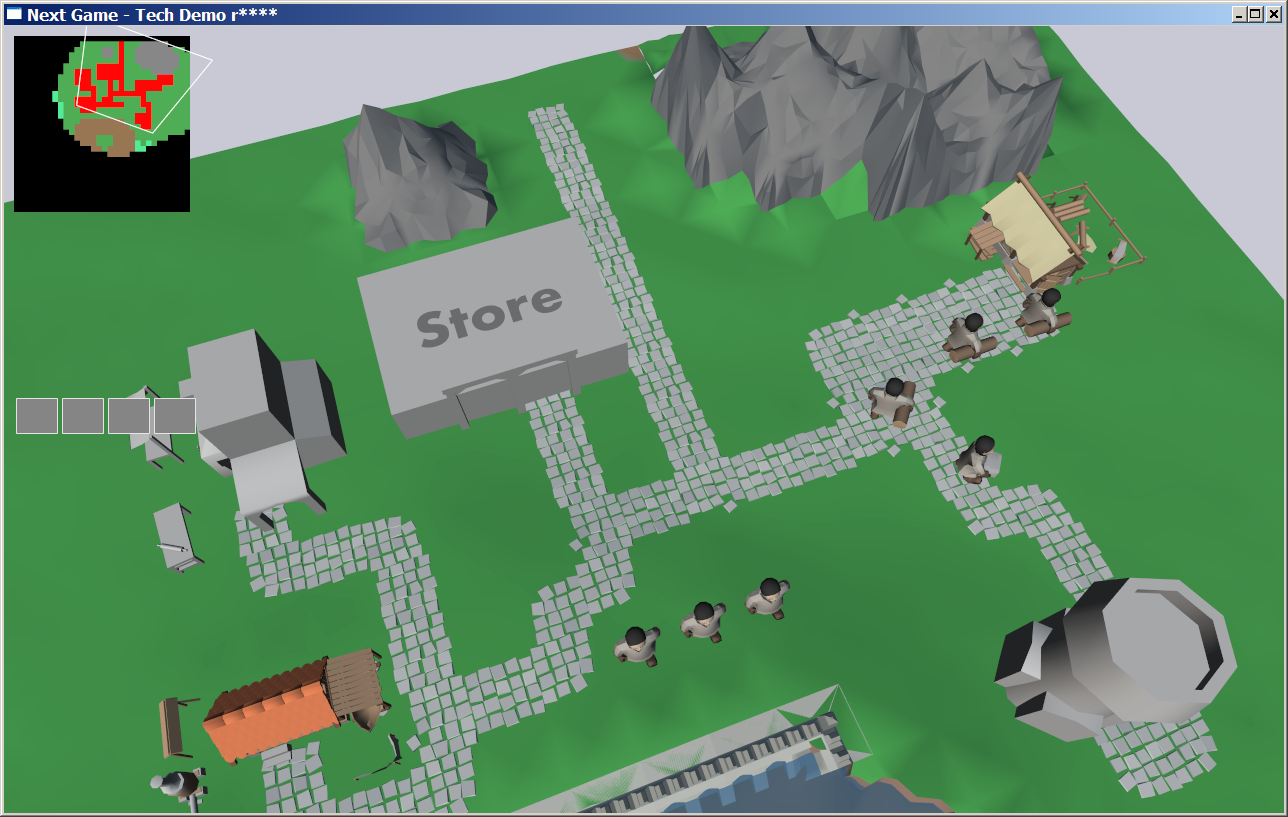
After sorting out even more problems in game (yet incomplete) regarding game update / render loop and interpolating between 10-ticks-a-second steps, we have walking units in game. Yay!