I have been asked an excellent question – how do terrain tiles and objects work in NextGame? NextGame maps are still created from tiles, but those tiles have taken an extra dimension and I’ll try to explain what does that mean. (Pictures inside!)
Small introduction first: Like in most of the games, we start with a plane somewhere in 3D space. In our case that plane is rectangular and lays along X/Y axis. Z axis is directed up from it. The plane has a specified size and consists of thousands of small squares (traditionally we will call them tiles). Each tile is roughly a size of a in-game unit – let’s say that’s approximately 1×1 meters. For simplicity some of the examples in this post will be shown on a single tile, but you can easily imagine how they come together with other tiles and form a landscape.
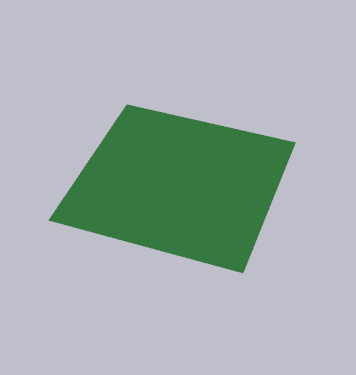
Let’s start with a lonely flat grass tile – pretty much boring:
Tile X/Y size can’t be changed, for the world has to have a constant size and shape. However being in 3D that means we can easily alter the third axis – Z. We will call it height. Since we are in a tile world, where single smallest building block is a tile, we can not modify it itself, instead we have a few control points, and the rest is taken care of by the games engine. What that means is, that we can edit heights of the corners of the tiles, but we can’t edit any other points within the tile. So let’s see how a small hill looks in NextGame:
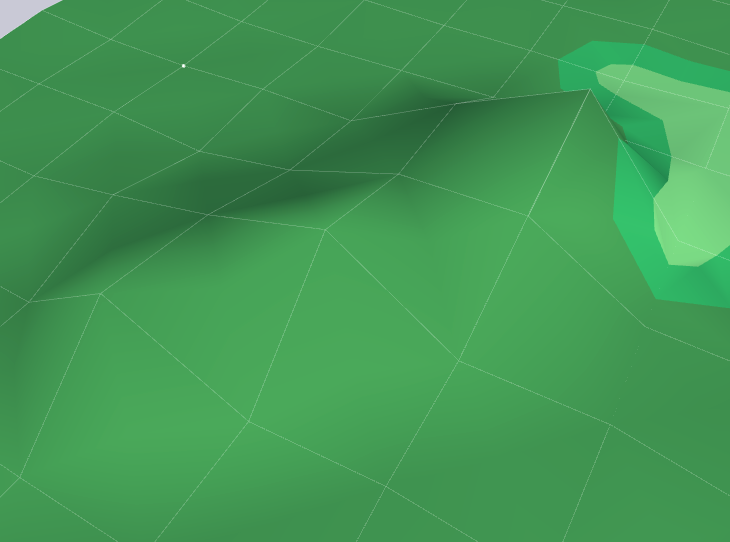
Terrain wires are turned “on” to help to see how it’s bent. Not very spectacular either, right? So let’s move on further and investigate what is that on the right side of that hill. Each corner of a tile has one more important property – a surface. That is a terrain type that corner has – e.g. grass, dirt, sand, snow, etc. Here’s a quick example of that:
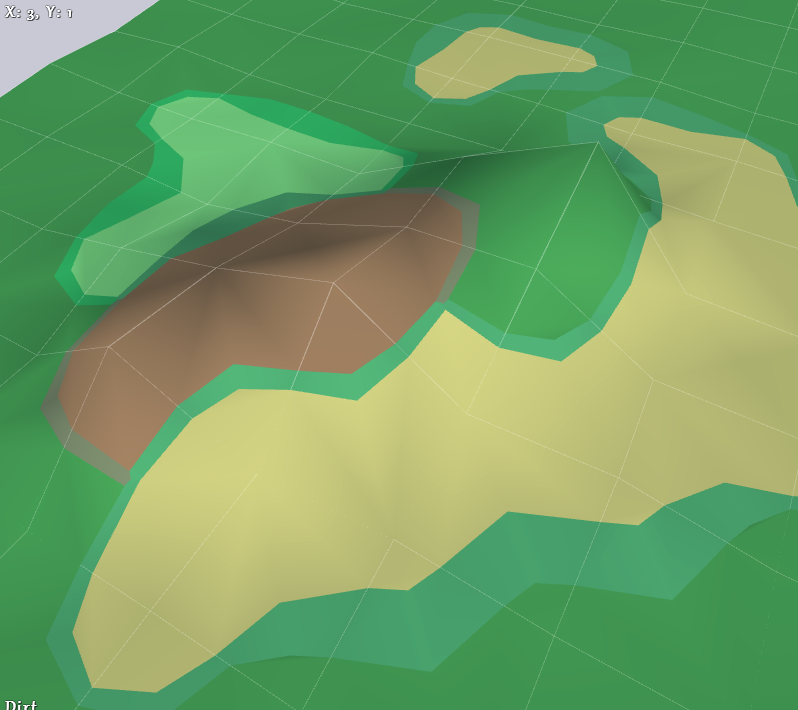
Notice how terrains mix with each other through generic transitions and that 3 terrains can meet together without a glitch (and in theory – all four). Those transitions are generic, which means that they are not very spectacular to look at, but they have a benefit – they are working for any surfaces combinations “out of the box”. I have also added another another property – transitions width, but this property is not of a tiles corner and not of a tile itself – it is property of the tiles edge. Those edge can be thin or wide (see the pic again). One more element, which is not yet implemented, but already planned through – variations. Those are alternative variants of the transitions and tiles. So for example a long straight line between grass and sand won’t be repeating the same on each transition tile, they will differ slightly, making the edge look more natural. Plain surfaces will also have variants in them resulting in small speckles within tiles here and there.
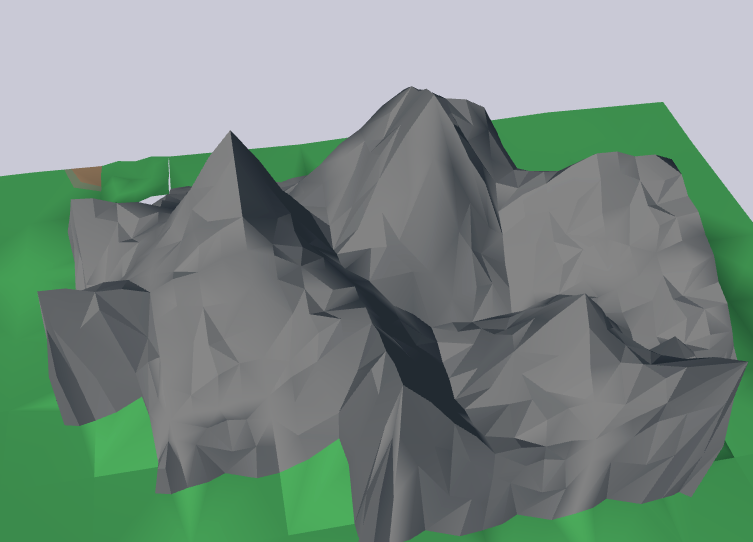
Moving on, how are different terrain types are made. Lakes and mountains. Those can not be realistically “painted” on a flat surface with the methods presented above. They need a special receipt – volume:
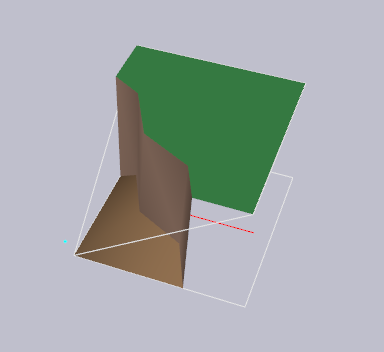
The single tile on this image has 3 corners with grass surface and one corner with water surface. In fact we use waterbed surface here. Water will be added a minute later. Obviously waterbed corner needs to be lower that the grass surface. Notice how tile corners (upper white outline) are in touch with the volume of the transition tile and edges are not. That grants us that we can connect ANY tiles by corners – they will always match, but for edges we always need to connect compatible tiles (with the same profile). Map Editors engine takes care of that automatically, mapmaker only needs to paint surface types and the engine will pick the right transition from a library.
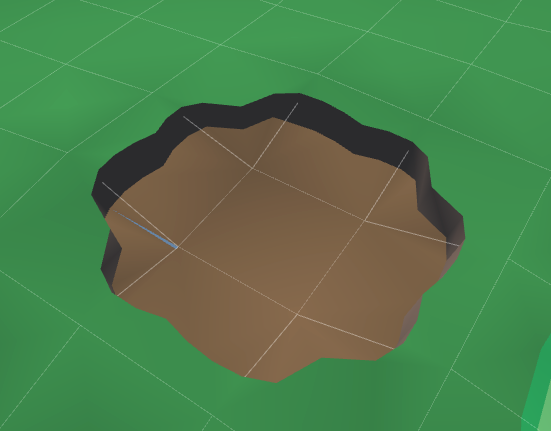
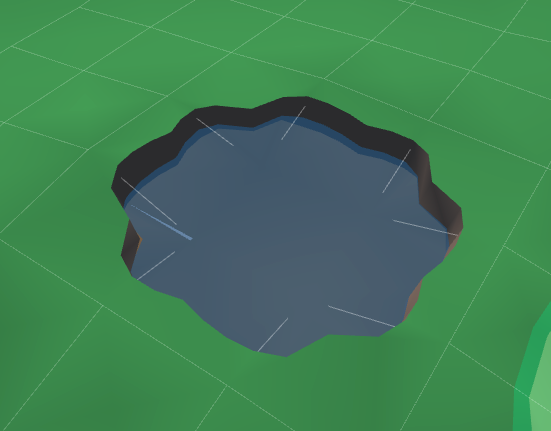
When we switch to NextGame terrain we can have the following setup – waterbed surface in a shape of a small pond, with its height slightly below surrounding grass plane. Now the magic thing happens – when there’s a waterbed there’s added a water surface plane, whose height can be tweaked separately, allowing to make our ponds depth different and shoreline more or less visible.
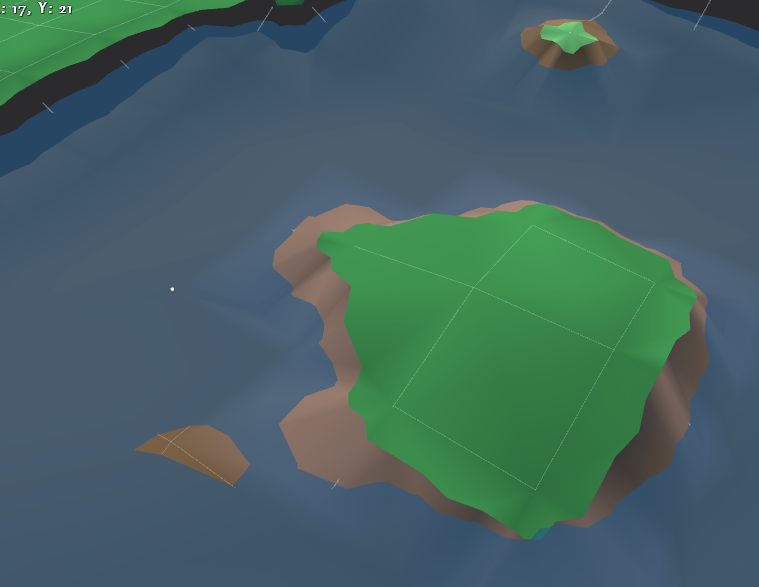
Taking a step further, we combine thin and wide transitions, waterbed and grass heights and tweak water surface level to create a nice looking shoreline around two small islands:
Mountains are made much the same, with steep and soft edges, but elevated into the opposite direction:
There are still some unsolved issues with water: Obviously water surface needs a nice shader, but that is a matter of time; More seriously though, I haven’t got a decent idea about how to make changes in water level, and flow direction. Think steep mountain rivers and small waterfalls. Mountains overall shape is a bit boring too, but I hope to resolve that with additional elements – decals and objects.
At this point we are done with the base terrain. Next article will be about stuff placed on top of it – objects, decals and roadworks!
P.S. As always – comments are very welcome 😉
Ah, that water surface plane makes me think of Settlers: Heritage of Kings. It’s not a bad approach but for that game it meant all water that was connected had to have the same height. Rivers that flowed down were impossible. And waterfalls were actually objects that came in different sizes and shapes. The waterfalls itself looked okay, but they hardly mixed with the terrain perfectly. An example.
As you can see some of these waterfalls look like they are floating or just stop mid-air. And if you rotated the screen sometimes you discover your waterfall isn’t even connected to the water (you place the object on the mountainside, so how it will look depends on the elevation).
All in all I don’t think it’s the best approach – although pretty easy and it CAN look good.
Thanks for valuable comment with a reference! 🙂
For the water I was thinking about allowing to split the water surface in huge areas, each of which could be set to a different height, or maybe tilted slightly.
Waterfalls .. don’t know yet, e.g. Settlers approach is quite good if we take extra care on avoiding the hanging ends, how do you think? )
It might work out great indeed, if you are careful. I found this picture on the internet, but I could make and upload some screenshots to show some Settlers waterfalls and their (dis)advantages if you like. And maybe also some screenshots of how it works in the editor. I have my Settlers 5 installed on an external hd which is at my parents’ place and I won’t have access to it before sunday evening, but after that I could show you some things if you’re interested – if you don’t think it will make a difference please say so, it will only save me work. ^^
Thanks for your offer!
I’m not sure seeing other games flaws might benefit the development of the new game. What would be better – seeing advantages and clever solutions 🙂
I hope to finish the second part of the article during the weekend and then we can discuss how decals might (or might not) work for us.
Okay, then I’ll wait. 🙂
Another issue with this type of water, as you can see on this picture: you are actually able to see underneath it – just look at the water behind the waterfalls. But I consider it a bug? I’m sure you won’t make that mistake. 😛
What I don’t like more on the screenshot – how terrain is stretched on the right from the waterfall – it looks resin or something 😀